Friday 6 November 2009
Animated material for screen or electronic billboards.
Next
Creating a static art asset for Unreal
Ok now bellow is the model iv made that i want to texture and get into unreal, I wont show you how to model it as ill assume that is known.
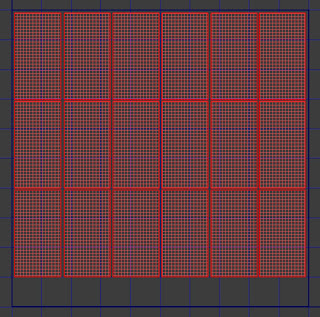
The model has windows. so we may want to apply a separate material in unreal to these parts so make sure they have different material ID when Unwrapping the UVW map. Again I will assume you know how to unwrap a model. The main body of the object should be mapped to material ID1 the glass should be mapped to material ID2. Bellow is how I have unwrapped the object notice where the seams are this is important for the next part.
material ID 1 This is in the uvw map editor inside max NOT the modeling viewport.
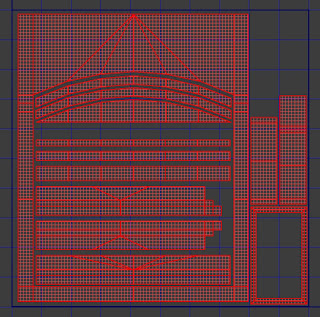 material ID 2 This is in the uvw map editor inside max NOT the modeling viewport.
 ok next create the normal map and diffuse textures for your model. You can create a very quick normal map in photoshop by using the UVW map, creating a selection and filling that selection with a block color on a new layer. Next use the Nvidia normal map plug-in which can be downloaded here and use the settings shown bellow to create a normal map that goes around the edges of the model. This is why each individual face on the physical model is mapped in a planner fashion on the UVW map and not broken up as breaking a face would cause a seam when generating the base normal map this way. See below for a visual demonstration of this process.
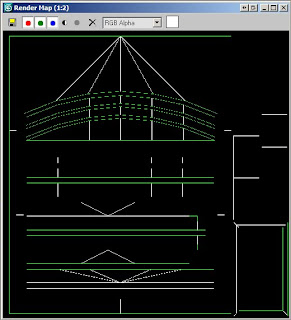
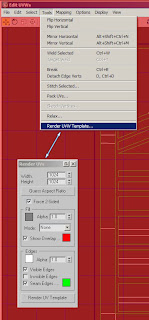 NOTE make sure your texture width and height at the top of the "render UV's dialogue are both set to 1024 at least. When you click on "Render UV Template" and you will get the dialogue box bellow. Click the little disk icon in the top left hand corner and save your template as a bmp to somewhere. Repeated this process for ID's 1 and 2 separately so you have 2 images now one of the unwrapped glass and one of the unwrapped window surround.
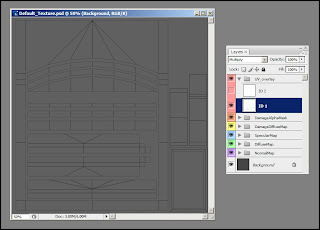
 Next take this into photoshop and open up your default texture PSD you created in the last tutorial (HERE PSD_Textures) and import these images into it so it looks like bellow…. I have put both material templates into the same PSD file this is just so I don’t have two PSD files for the one object but this will mean I need to double up some of the folders later and name them differently. Also I have (to make the image clearer) inverted both the templates so the black background is now white, then desaturated the image so I get nice black lines and finally I have set the layers to "multiply" as can be seen in the dialogue.
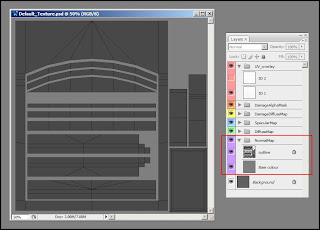
 Next iv made the selection around the outside of the polies in the UV template, inverted the selection and filled this a dark grey in the "NormalMap" folder. Below this layer I have filled a layer fully with a lighter gray.
Next making this into a normal map (and maybe a breather, because BLOODY photoshop crashed while I was working :P)
OK. next select the darker gray layer with your outline on it (make sure there is no selection in active as this can cause a crash) I’m assuming you have installed the Nvidia photoshop filter I directed you to above now start this from the "Filter" menu and use the setting I show below. This should give you a nice bevel around the edges of your object.
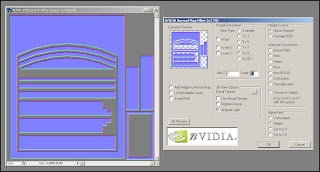 Now select the layer bellow it which is filled with the lighter grey and apply the Nvidia plug-in to this layer too the previous settings will be fine as it will just fill it a flat blue and you should have an image that looks like the one below…
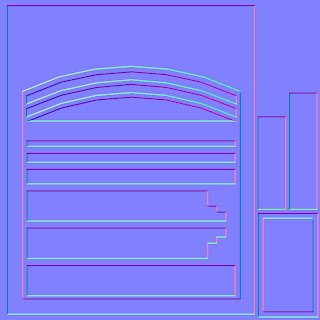
Now do the whole process again with the glass.. creating a separate folder for this normal map and name them appropriately.
Next you need to save this PSD appropriately and keep it safe for when you want to edit it. Also save out both ID's normal maps as .TGA file with just the normal map as the last image above. This will be use in Max and Unreal to create a nice bevel around the edges of your object. Bellow is an image of how this now looks inside max and how the material editor is set up.
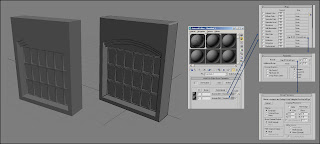
Ok now I would start creating high poly geometry and detail meshes to add more detail to the model… but it’s not important for this tutorial, so let’s move on to exporting this into Unreal.
so select your object and go to file-export selected and choose somewhere to save it that appropriate. Select the "save as type" box and choose "ASCII Scene Export (*.ASE)" then name the file something appropriate, and hit save! Use the setting bellow in the ASE exporter dialogue box.
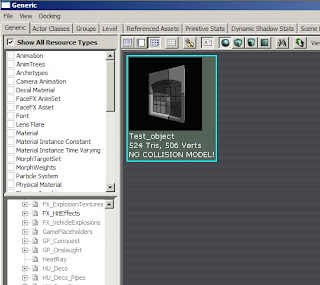
ok now for getting it into unreal. In the "generic" unreal browser window select File-Import and browse to where you saved your object ASE file and double click it. The unreal "import dialogue will pop up but just click OK for now as it doesnt really matter what its called or where its being saved to for this tutorial. Your "generic" browser in unreal should now look like this….
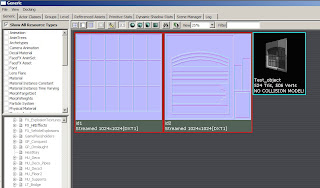
 Ok now go to File-Import again and now import your normal maps but, In the import dialogue this time scroll down to where it says "CompressionSettings" and choose TC_Normalmap in the dropdown box (this is only for normal maps for spec or diffuse or any other maps the default setting is fine) and press OK now your "generic" browser in unreal should now look like this….
 Ok now you want to right click on a black space on your "generic" browser window and choose "New Material" and when the dialogue pops up just give it a name and click OK. now your browser should look like the one bellow or something similar. the new window that opened is the material editor you can get to it by double clicking on any material. the sphere surrounded by green above it is the material we have just created. Ok now to get your textures into the material editor you just highlight the texture in the generic browser go to your material editor press down the T key and left click and hey presto!
Now link the normal map to the normal map slot like the image bellow, Drag a constant and link it to the diffuse slot and there is a basic texture! see bellow.


